TL;DR
This article looks at setting up a very basic CD pipeline using Visual Studio Team Service (VSTS) and Octopus Deploy for Azure Functions.
Use case
I've been playing with Azure Functions for a while - nothing serious, just a bit of tire kicking.
With the preview release of Visual Studio tools for Azure Functions, I thought it would be interesting to setup a Continuous Deployment pipeline.
I'd also like to add a bunch of functions to handle the deployment of my blog content. My blog content is current in the source of the website, thus every new blog needs an entire site release - definitely not practical. It was always intended as a half-way-house until I had a chance to separate the content into its own repo (Github probably) and have a publishing pipeline in place. Ultimately this collection of services will provide that pipeline.
So, all in all, a good time to have a go. Let’s get started.
Visual Studio
The starting point for this was this blog article.
This talks you through the new tools for Azure Functions.
I followed it down until the Publishing section (as of course I want to use Continuous Delivery).
Two things I would call out that helped with this article;
Firstly, run Visual Studio as Administrator if you want to debug your project. Debug will attempt to start the Azure Functions CLI – of which part is a host for the functions. This host needs to be able to create a HTTP listener – to do this it needs to run as administrator (there are other methods of allow non-admin to create HTTP listeners … but for now easier to just run as admin).
Secondly, the Microsoft Azure Storage Explorer is a really great tool if you want to test your function. It allows you add a queue and create a message directly from the desktop. Proving very useful for a quick test.
You can see the structure of my initial project here.
At the moment it is a single Function project. In time I’d expect to add library and test (xUnit) projects – but more on that in future articles.
VSTS
I've then setup my build within Visual Studio Team Service. The steps are fairly simple at this stage and should be easy enough to replicate within Team City, Jenkins, etc.
The build is setup to run on commit to the Github repo, and goes through the following:
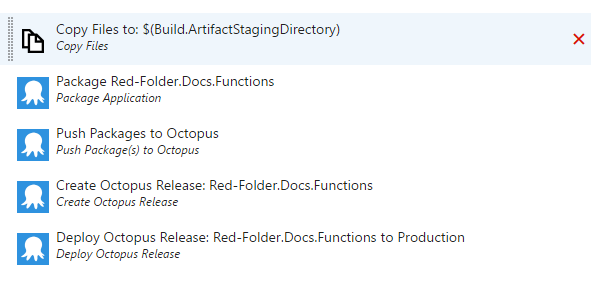
The first step is a bit of a workaround until such time as the tools can support Publish to File System (currently they don’t). The good thing about Azure Functions is that there is little complex about the code structure. So all I do is copy in the relevant files to the artifact staging folder.
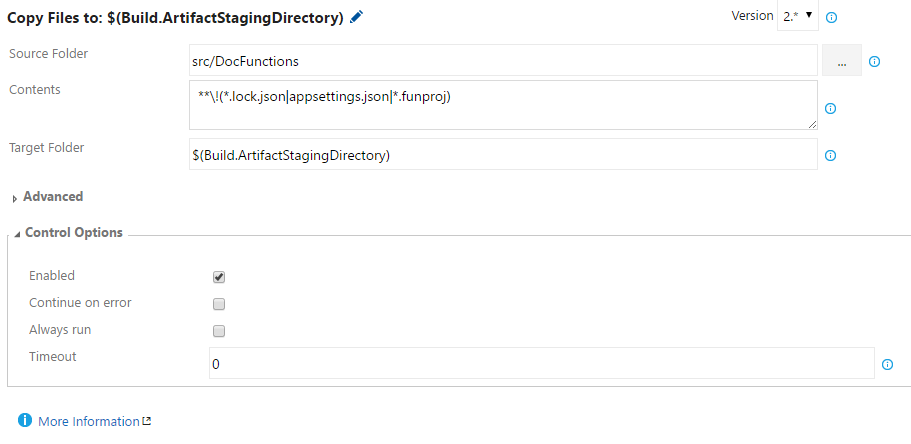
Note that I’m excluding files that aren’t required for the Azure Function to run.
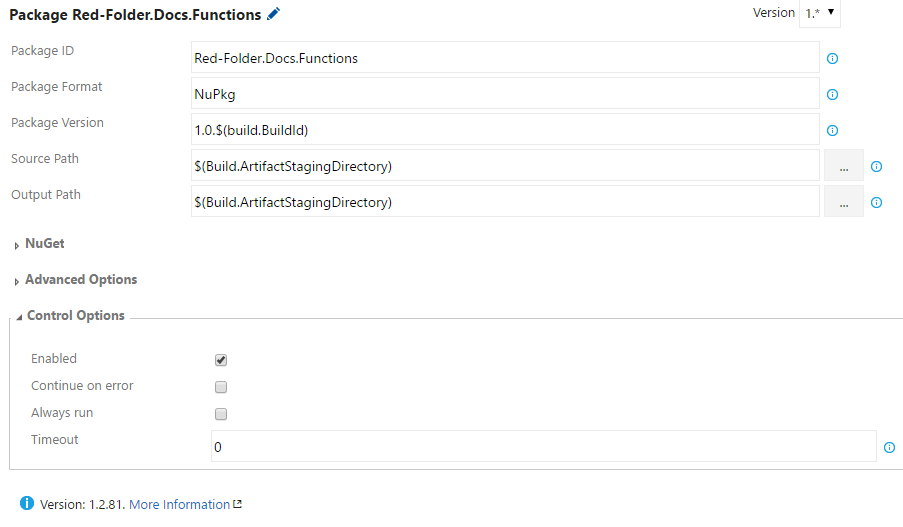
I’m then using fairly standard Octopus Deploy steps to Package up the function:
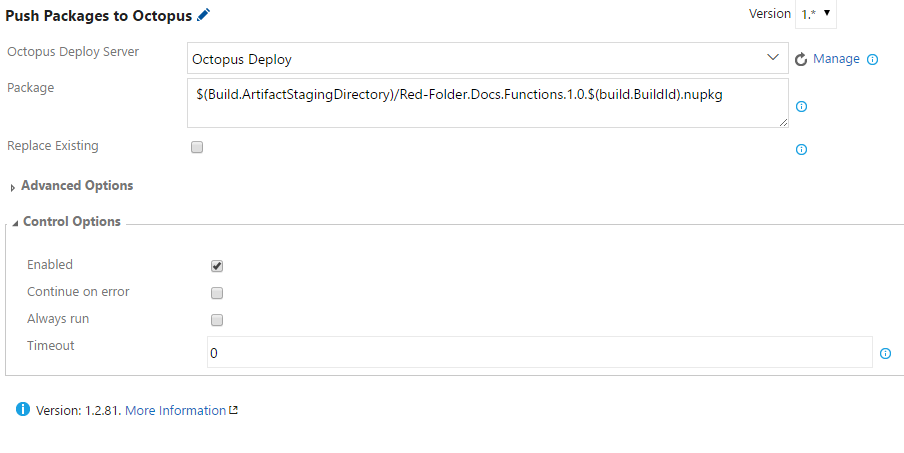
Then push it to my Octopus Deploy server:
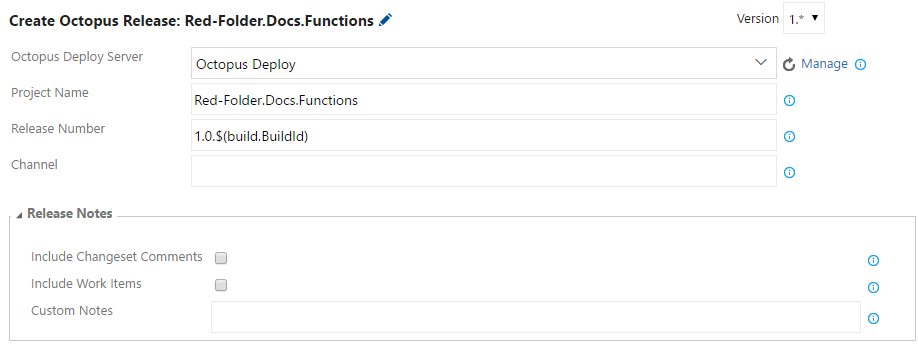
Create a release:
And finally deploy to production (note that I check the Show Deployment Progress so that the build reports the result of deployment):
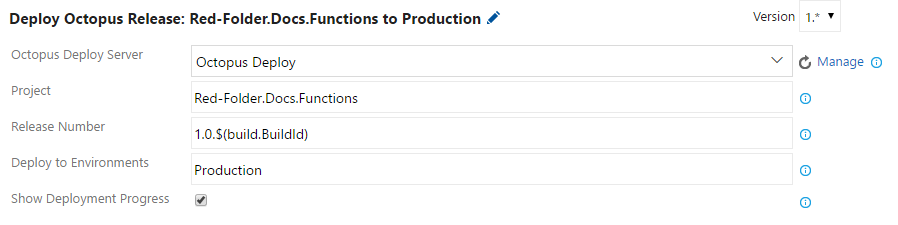
(Obviously they latter steps won't work until the Octopus Deploy project is setup or the Production environment … on to those now)
Production Environment
Nothing hugely special here. I’ve gone in via the Azure Portal and provisioned a new Azure Functions App. Made sure it has storage. Job done.
Octopus Deploy
Again, largely simple stuff.
Created a project.
Create a Production only lifecycle (I may have a Staging step at some point, but not at the moment).
Added a Process step of “Deploy to Azure Web App”:
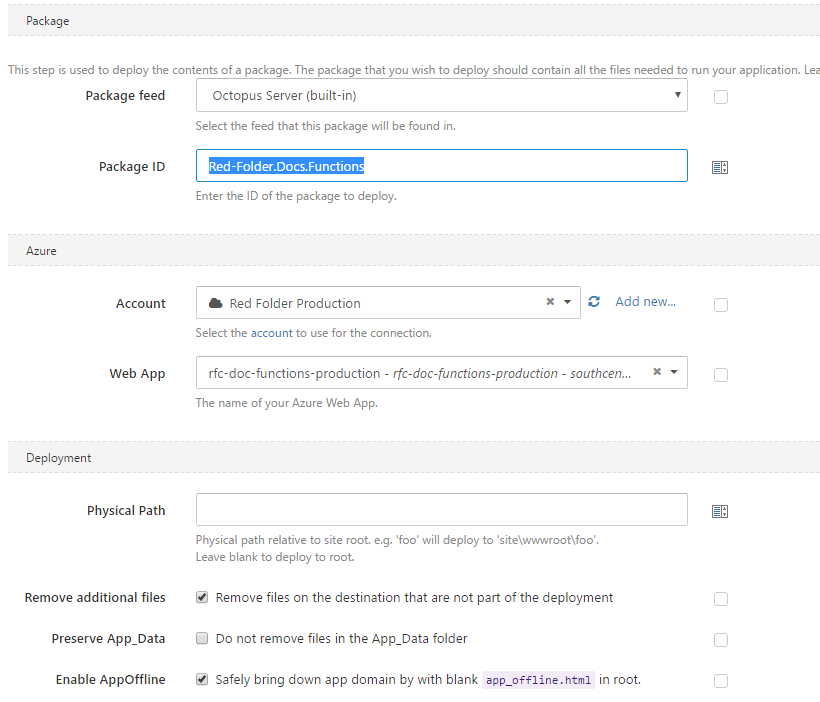
This I then configured up to use the Red-Folder.Docs.Functions package feed (used in the VSTS Push above), and deploy to Web App I'd configured via the Azure Portal:
And we are done
Couple of updates from Visual Studio shows that the pipeline is working as expected. All good.
I'll add further complexity to the pipeline as I need it (I'm thinking as I add the library code and xUnit tests).
But this basic pipeline concludes this article.