In this series, I document my journey to prepare a Kubernetes lab - which I shall be using as part of an ongoing talk series regarding containerisation.
I've delivered two talks to a client so far - one an introduction to containers (Docker focused) and one an introduction to Docker Swarm.
While I like Docker Swarm, it doesn't feel like the long term winner in the container orchestration race - that seems to be Kubernetes. So my next talk will largely be a repeat of the Docker Swarm - but using Kubernetes. I'll likely follow that with deeper dives into the Kubernetes platform and associated technologies.
As I build out the lab, I wanted to blog about it - mainly to assist me should I ever need to do it again - but possibly because it may prove helpful to others.
In this first part, I start with creating a virtual network.
Why the virtual network?
Ok, if I learnt anything from my Docker Swarm talk, setting up the VMs to run it on was probably the most difficult part.
And if I'm honest, I was never very happy about how I actually configured it for that talk.
So for the Kubernetes one, I wanted to try and make it better.
Self imposed constraints
I'm imposing some contraints on myself - so probably best to explain those ahead of time. Otherwise you would be correct to question my judgement.
(You still may ... if so, I'm always interested to hear your thoughts)
Constraint 1: I want to be able to demo offline. This is to handle situtations where I may not have internet connection. The last thing I want is for a talk to stall while I struggle with getting WIFI. This immediately knocks out cloud based solutions and limits me to my laptop.
(Obviously there is a concern over have a single point of failure with my laptop. Maybe at a later point I will also have a cloud variant of the lab so I can fallback)
Constraint 2: Needs to be able to handle multiple WIFI networks. I found this before with the Docker Swarm lab - I was able to have it working with internet connectivity on my home WIFI - but not the work WIFI (somewhat of a problem).
Constraint 3: I wanted to stick with Hyper-V. I'm aware that there are other virtualisation technologies I could use on my latop (Win 10, 16GB mem, Quad i7) - but I have Hyper-V for other uses, so didn't want to contaminate my already quite "busy" machine with even more.
Network Design
The network I wanted was fairly simple given my contraints - or at least I though so.
I just needed a Hyper-V switch with internet connectivity (DNS, HTTP/S, etc) on whatever WIFI I happened to be using.
I would then create a number of Ububtu VMs to live on that switch to host the Kubernetes cluster (more on that in the next part).
Creating the Hyper-V switch
The short version of this is that I needed to follow this guide here to correct setup the switch.
The longer version is that because I wanted the switch to provide internet access regardless of which WIFI I was on, then I needed to use Network Address Translation (NAT) provided in Windows 10 (new feature).
Prior to this I was using the Internet Connection Sharing (run ncpa.cpl, properties on your WIFI connection, then share with the virtual switch) - however, this wasn't portable when I switched between WIFI networks (home, work, coffeeshop, etc) - or at least not without some reconfiguration each time.
Creating a virtual network with NAT made that whole job a lot easier.
So I effectively ran the following:
# Create the new virtual switch
New-VMSwitch -SwitchName "NAT Cluster" -SwitchType Internal

# Get the ifIndex of the new virtual swtich (in my case it was 18)
Get-NetAdapter

# Configure an IP range against the virtual switch
New-NetIPAddress -IPAddress 192.168.137.1 -PrefixLength 24 -InterfaceIndex 18

# Configure the NAT
New-NetNat -Name Cluster -InternalIPInterfaceAddressPrefix 192.168.137.0/24
This provided me with a 192.168.137.* address space on my virtual switch.
The astute amongst you may have noticed that I've used the same ip range as used by the Internet Connection Sharing - this just seemed like a good idea - but didn't need to be that. I also knew that that range didn't clash with either my home or clients WIFI networks.
I've then configured the network settings so that my laptop has the 192.168.137.1 IP address on that virtual network:
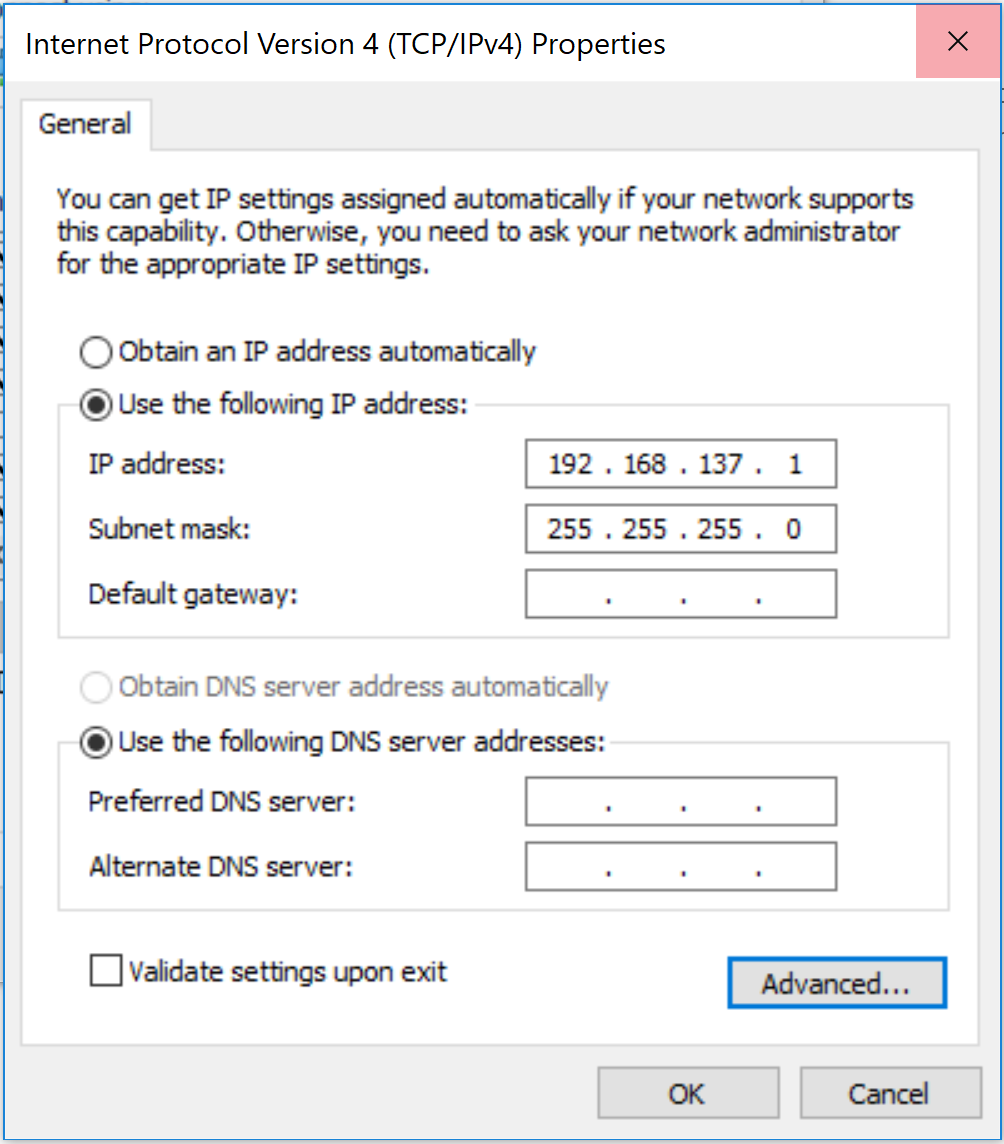
Then for DNS
At this point you should be able to route from any virtual machine connected to the virtual switch to the internet.
There is however a gap - it doesn't automatically handle DNS resolution.
Personally I would have expected it to - just set the DNS to the same IP as the NAT gateway - but it just doesn't.
Luckily this article provides a solution.
Roman, the author of the article, has create a nice little Windows Service which provides DNS resolution services for us. It can be accessed by the virtual network (in my case on the 192.168.137.1 address) and then forwards the request to the currently configured DNS resolver.
This works great when I switch between WIFI networks. So far I've had no problems.
Roman provides as an MSI - but if you are nerveous about the code, you can download from Github and compile it yourself.
Network done
So at this point, I now have my network configured and working.
The next step is to create the Ubuntu VMs on which I shall be running the Kubernetes cluster. I'll start that in the next post.